Marp Github 仓库地址
Marp-cli Github 仓库地址
Marp 项目官网地址
介绍
Marp, Markdown Presentation Ecosystem, 是一个用 Markdown 制作 PPT 的工具. 可以将 Markdown 文件转换为 PDF, PPT, 图片等.
安装
在 Archlinux 下, 可利用 AUR 安装:
marp-cli 基本使用
输出
将 markdown 输出为 PDF
1
| marp --pdf slide-deck.md
|
或:
1
| marp slide-deck.md -o converted.pdf
|
将 markdown 输出为 PPT
1
| marp --pptx slide-deck.md
|
或:
1
| marp slide-deck.md -o converted.pptx
|
将 markdown 输出为 PNG/JPEG
输出为多张图片
将每一页都输出为一张图片.
用 --images:
1
2
| marp --images png slide-deck.md
marp --images jpeg slide-deck.md
|
输出一张图片
将 title page 输出为一张图片:
1
2
| marp --image png slide-deck.md
marp slide-deck.md -o output.png
|
预览
Watch mode
其会先利用 hello.md 输出 hello.html, 利用浏览器打开 hello.html 之后, 就可以编辑和修改 hello.md, 同时浏览器也会刷新.
Preview mode
其会生成 hello.html 文件并立即打开预览窗口.
Server mode
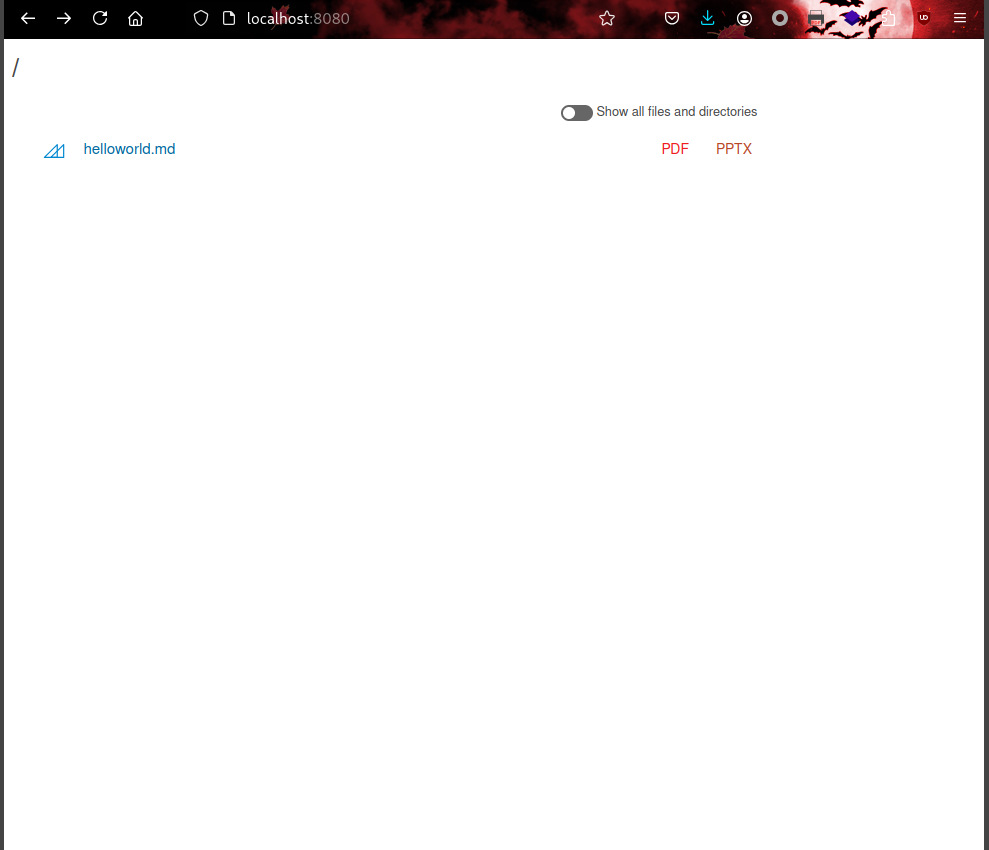
指定一个目录, 默认占用 8080 端口, 会打开一个页面 http://localhost:8080, 显示所有文件, 可以选择查看预览.

可以指定其他端口:
1
| PORT=5000 marp -s ./test
|
模板
可以指定一个模板 (类似 PPT 模板) 来使用, 默认使用的是 bespoke:
等价于:
1
| marp --template bespoke -p hello.md
|
bespoke 模板的一些参数
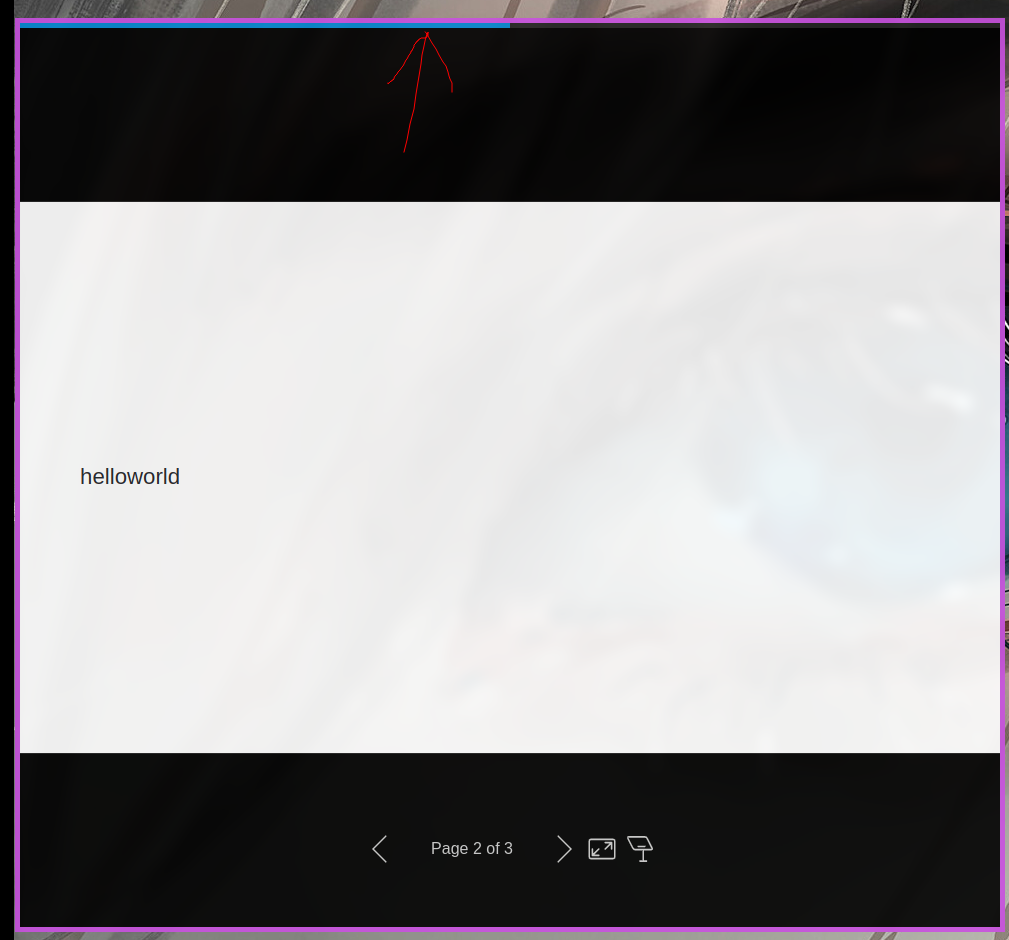
添加顶部 progress bar
1
| marp --template bespoke --bespoke.progress -p hello.md
|

幻灯片切换的过渡动画
需要添加一个头部, 如:
1
2
3
4
5
6
7
8
9
| ---
transition: fade
---
---
|
也可以在中间某页使用其他的 transition:
1
2
3
4
5
6
7
8
9
10
11
12
13
14
15
16
17
18
19
20
21
| ---
transition: fade
---
---
<!-- transition: cover -->
Changed the kind of transition to `cover`.
---
<!-- _transition: none -->
Disabled transition for this slide.
---
Got back cover transition.
|
可用的 transition 可具体查看 github.
可以给 transition 添加 duration 如:
这些内容不会对显示有影响.
在 CLI 进行设置
--title--description--author--keywords--url--og-image
在文件头设置
1
2
3
4
5
6
7
8
9
10
| ---
title: Marp slide deck
description: An example slide deck created by Marp CLI
author: Yuki Hattori
keywords: marp,marp-cli,slide
url: https://marp.app/
image: https://marp.app/og-image.jpg
---
|
(这些设置可以用 CLI 参数覆盖)
Theme
可以用 CSS 自定义主题, 如 hello.css 的文件内容为:
1
2
3
4
5
6
7
8
9
| section {
font-family: 'Arial, sans-serif';
background-color: #f0f0f0;
color: #333;
}
h1, h2, h3 {
color: #007acc;
}
|
指定一个 custom theme
1
| marp --theme hello.css -p hello.md
|
指定多个 custom theme
1
| marp --theme-set hello.css world.css -p hello.md
|
基本语法
分页
用 --- 即可, 如:
1
2
3
4
5
6
7
|
first page content
---
second page content
|
图片设置
图片设置的参数可以叠加使用, 如 bg, right, x%, 可以写为: bg right 90%, 意思是, 图片作为背景, 且放在右侧, 比例为 90%.
将图片设置为背景
设置图片高度
1
| 
|
设置高度为 350 像素.
设置图片自动填充
1
| 
|
或者:
设置图片填满
1
| 
|
设置图片高度
设置图片高度
设置图片高度
配置文件
Marp 默认在当前目录下找配置文件, 也可以用 -c (configuration) 指定路径.
配置文件可以是几种格式:
marp.config.jsmarp.config.mjs (ES Module)marp.config.cjs (CommonJS).marprc (JSON/YAML)package.json 文件中的 marp session
这里介绍 package.json 的写法, 如:
1
2
3
4
5
6
7
8
|
{
"marp": {
"themeSet": "./themes",
"html": true,
"allowLocalFiles": true
}
}
|
假设目录结构为:
1
2
3
4
5
6
| .
├── AwesomeMarp_blue.md
├── md
├── package.json
├── README.md
└── themes
|
用于制作的 markdown 文件都放在 md 目录下, 可用的主题放在 themes 目录下, 则生成一个 pdf 可以为:
1
| marp --pdf ./md/hello.md
|
则会生成 ./md/hello.pdf 文件.

